Do you know how to take a screenshot on a laptop? I bet you don’t know them all. There are some that even advanced users don’t know about. I’m more than happy to tell you about all these obscure ways and what extra benefits you can get from them. They’re super convenient and allow you a lot more flexibility with the pictures you take of your screen.

Method 1: Quick Screenshots
This is the simplest and quickest way to take screenshots. All you need to do is press the Windows key and the PrtScn key at once. Windows will then take a picture of the screen and save it in a folder named “Screenshots” in the User Pictures folder. You can find the latter under the Quick Access panel on the left side of Windows Explorer.
If you can’t find the correct folder, go to your Windows Explorer, click the address bar and copy-paste the following address into it: “%userprofile%\Pictures\Screenshots”. Make sure to exclude the quotes, and you’ll be taken directly to the folder where your screenshot is stored.
Method 2: Snipping Tool
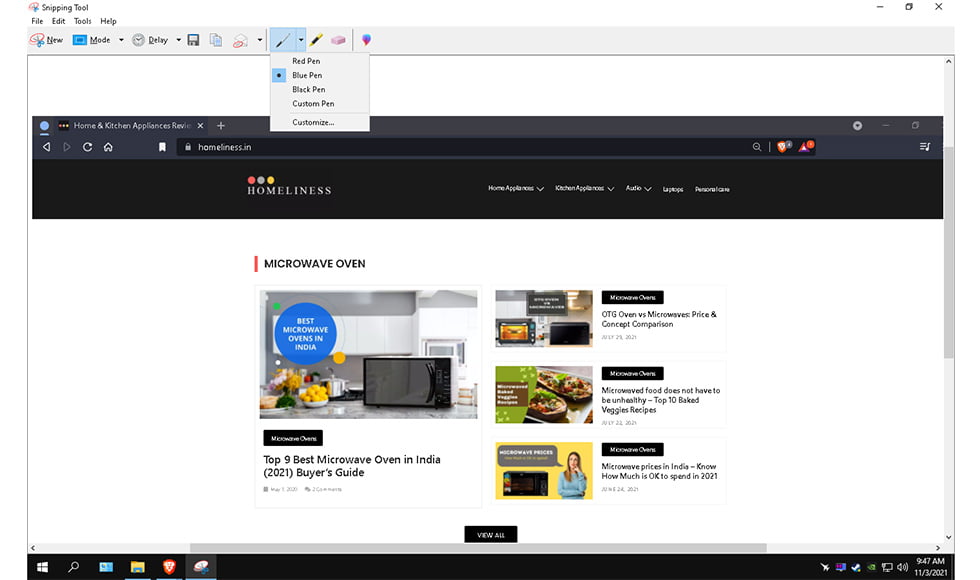
Using the Snipping Tool lets you take screenshots quickly, and it also allows you to do some level of editing. You won’t have complete freedom with what you can do, but you can still do some quick edits. The best thing about Snipping Tool is its Rectangular Selection mode. With Rectangular Selection, you can take a screenshot of a specific part of the screen. Additionally, you can also highlight and mark content.

To open the Snipping Tool, bring up Windows Search by pressing the Windows Key and S Key. You can search the app name there and open it from the results. Once it’s open, all you need to do to take the screenshot is press the “New” button. Your cursor will become a plus sign, which you can use to select and screenshot a certain area. Lastly, you can save the screenshot after editing it by right-clicking and pressing Save As.
Recommended Reading: 11 Best laptops under 30000 in India 2023 – Reviews & Buyer’s Guide
Method 3: Copy Pasting With The PrtScn Button
Unlike the first method, you can use this one to edit your screenshot even more. Press the PrtScn button to copy the current screen onto your clipboard, then open up Paint. Once open, press Ctrl+V to paste the screenshot onto the Paint page. After doing that, you can customise the screenshot with shapes and text boxes.
Method 4: Quick Snipping
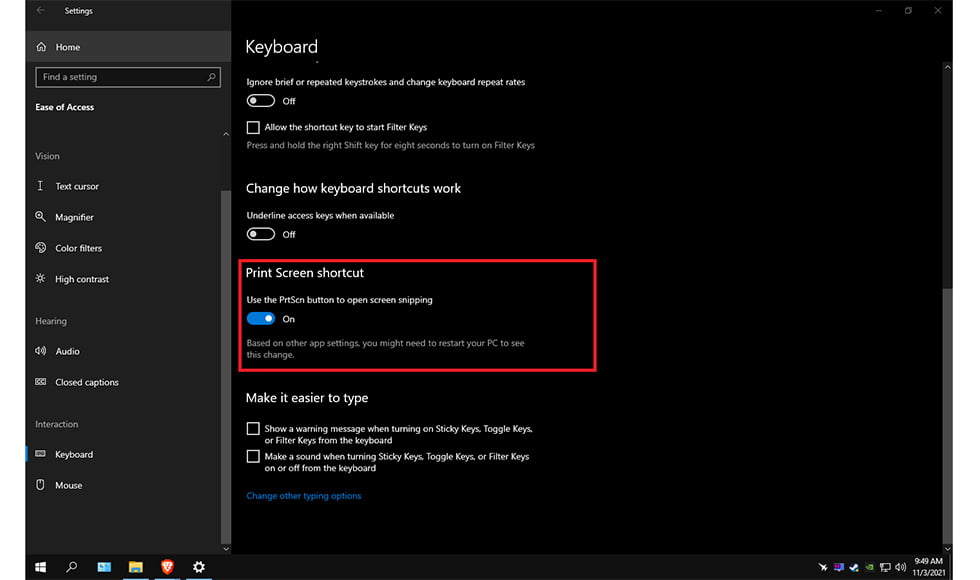
You can press the Windows, Shift and S Keys together to open up a similar screenshot app to the Snipping Tool- the Snip And Sketch app. It’s useful for taking quick screenshots of portions of the screen to paste them into messaging apps in a browser like Whatsapp or Messenger. The difference is that you won’t be able to directly edit the output or save it. It’ll be copied to the clipboard and can only be pasted directly to a chat interface or Paint. You can save the image after you do the latter.
You can also set your PrtScn button to open up this app by default, rather than taking a screenshot of the whole screen to the clipboard. To do so, open up Settings and go to Ease Of Access. There’s a Keyboard option at the bottom of the left pane. Then, scroll down the right pane till you see the option below and turn it on.

Recommended Reading: The 11 Best laptops under 40000 in India 2023: Expert Picks
Method 5: Fn Key
You can use this variation of Method 3 if your PrtScn key is on an F key. To take screenshots using this sort of key, you have to hold down the “Fn” key first before pressing the Print Screen key. Most laptops have individual keys and don’t combine the screenshot key with the F keys, but many entry-level laptops have such key combinations due to the smaller form factor.
Wrapping Up
There you go; you now know how to take screenshots on a laptop in different ways. These methods may seem simple, but you’d be surprised to know how many people don’t know about some of them. I’m sure you learnt a new way that’s more convenient for you after reading through everything I said.
That’s all for now. I hope this post helped you with your curiosities. I’ll see you in the next article.
- Need An Entry-Level NVIDIA GTX 1650 Laptop? Check Out The ASUS TUF Gaming A15 15.6″ FHD AMD Ryzen 5 4600H - December 19, 2022
- Why You Should Try The Lenovo IdeaPad Gaming 3 AMD Ryzen 5 5600H 120Hz Gaming Laptop – A Laptop Designed To Last - November 8, 2022
- A Review Of The HP Pavilion Gaming DK2100TX 15.6-inch Laptop – The best 11th Gen Mid-range Laptop - November 8, 2022
